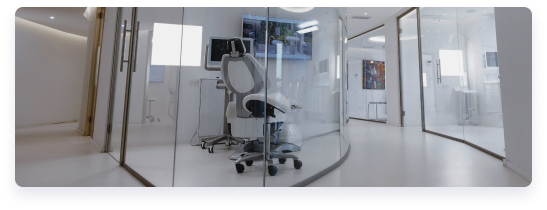
Healthcare professionals.
Health care jobs are in high demand across the board. Whether you want to spend 10+ years in college or less than a year, you can find work in the medical field. All you need is a good education and a passion for helping others to start a profitable and rewarding career.
Healthcare organisation.
Hyre has been specially created to save the NHS time and money. We’ve combined our extensive technological know-how with years of experience as locums ourselves. That means there’s nobody who understands more about what healthcare organisations and professionals need to do their jobs as efficiently as possible.
Frequently Asked Questions
Sign Up
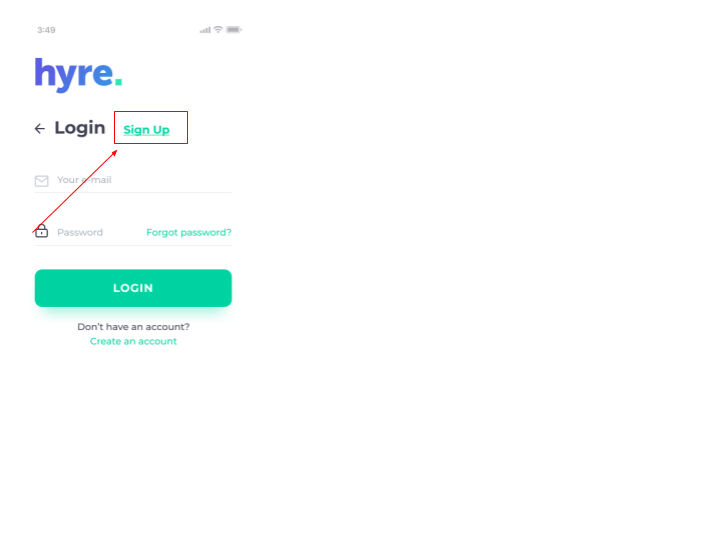
How do I sign-up?
Click sign-up on the landing screen and complete the required fields. The app will walk you through the different sections that need to be completed.
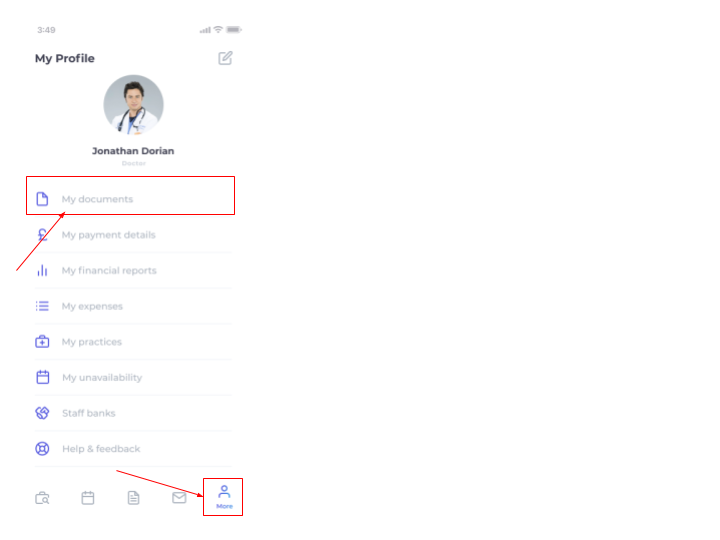
How do I upload my documents?
To upload documents, click ‘More’ on the bottom menu and then click ‘Documents’. Here you can select the document you want to upload. You have three options to upload the document, you can take a photo using your camera, upload a photo from your phone storage or upload a document from your cloud storage. You can also set an expiry date for the document so that you are reminded by email to renew the document before it expires.
How long does it take for the documents to be approved?
Before you can apply for jobs or contact practices, your documents will need to be verified. This typically takes a few hours, but if often quicker. Once they have been approved you will be notified by email and you can start applying for jobs.
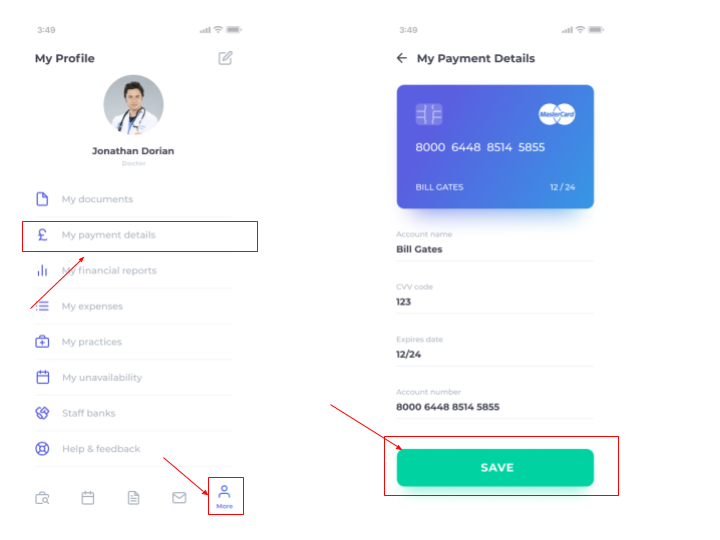
How do I update my payment details?
Payment details are added to the invoices so the practices know where to send the payment. These can be updated by clicking the ‘More’ menu at the bottom of the screen and then clicking ‘Payment details’. Here you can update your bank details.
Jobs
How do I apply for a job?
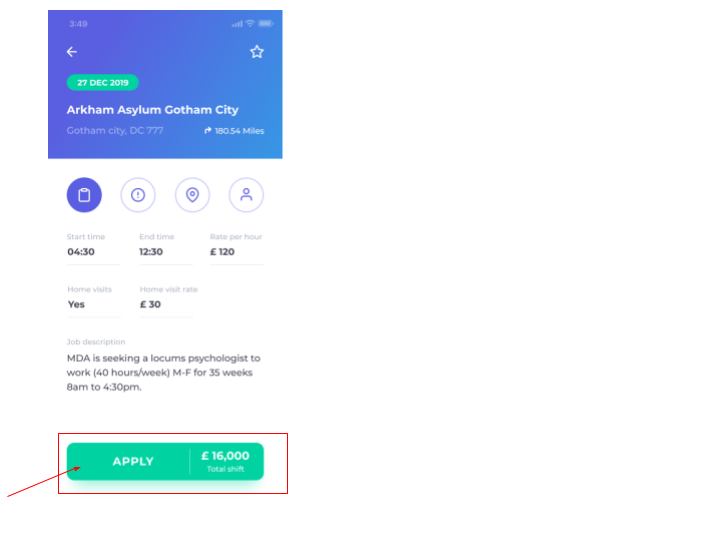
To view available jobs, click on the ‘Jobs search’ on the bottom menu. Here all available jobs will be listed. To apply for a job, click on the job and you will be taken to a screen where you can see more details about the jobs, such as the address of the practice and contact details for the practice manager. Simply click on the ‘Apply’ button.
How do I cancel a job?
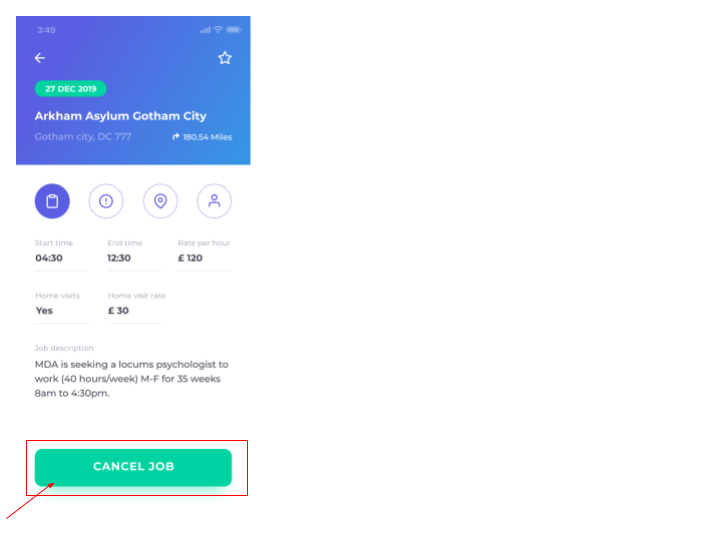
To cancel a job, go to ‘Applied’ jobs under the ‘My Jobs’ menu, click on the job you want to cancel and then click the ‘Cancel’ button. Please note that depending on the practice you may only be able to cancel a job via the hyre app if it is done within a certain period of time before the date of the job.
How do I know if I have been booked for a job?
If your application for a job has been approved by a practice, you will receive an email and a notification. To view a job that you have been booked for, go to Booked jobs under the My jobs menu.
How do I add jobs not sourced on Hyre?
You can also add jobs not sourced on hyre to the app. This will allow you to manage all your jobs and invoices in the one place. To add a job, click on ‘Booked jobs’ and the ‘+’ button in the bottom right of the screen
Messaging
How do I message a healthcare organisation?
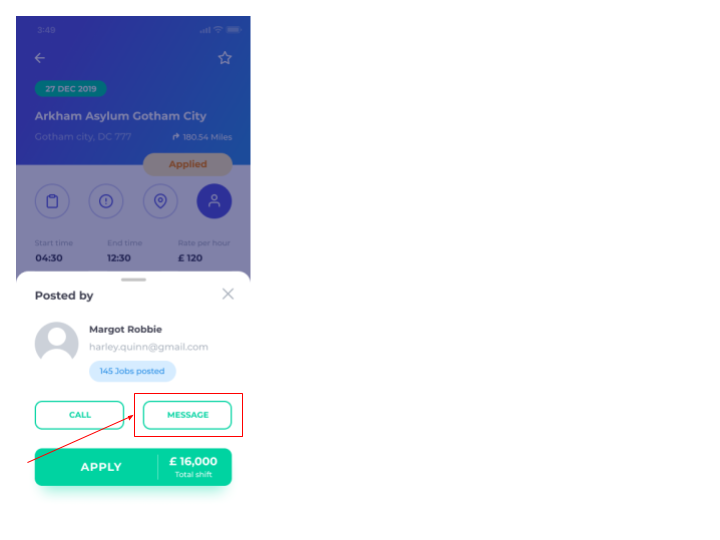
Your documents need to be verified before you can message a healthcare organisation. To message a healthcare organisation click on a job posted by the healthcare organisation and then on the ‘Message’ button.
How do I know if I have received any messages?
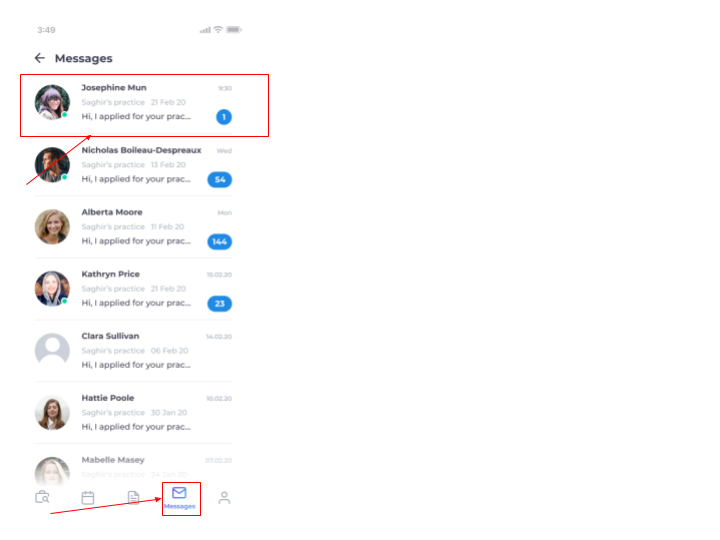
You will receive an email notifying you that you have received a message from a healthcare organisation. You can view the message in the app by clicking on the ‘Message’ item on the bottom menu.
Invoices
How do I create an invoice for my completed sessions
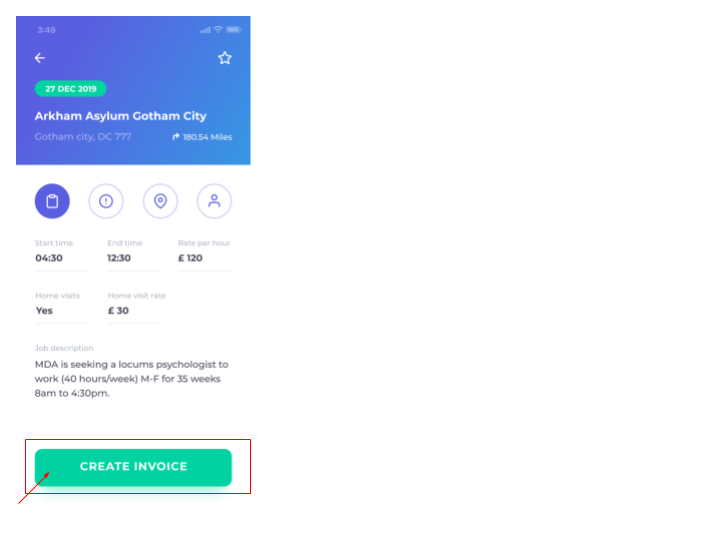
To raise an invoice for a completed session, click on the completed job and the click on the ‘Create invoice’ button. You can add multiple jobs to the invoice making easier for you.
How do I know if I have received any messages?
To update an invoice, click on the ‘Invoice’ item in the bottom menu, click on the respective invoice and then the ‘Edit’ button.
How do I send the invoice?
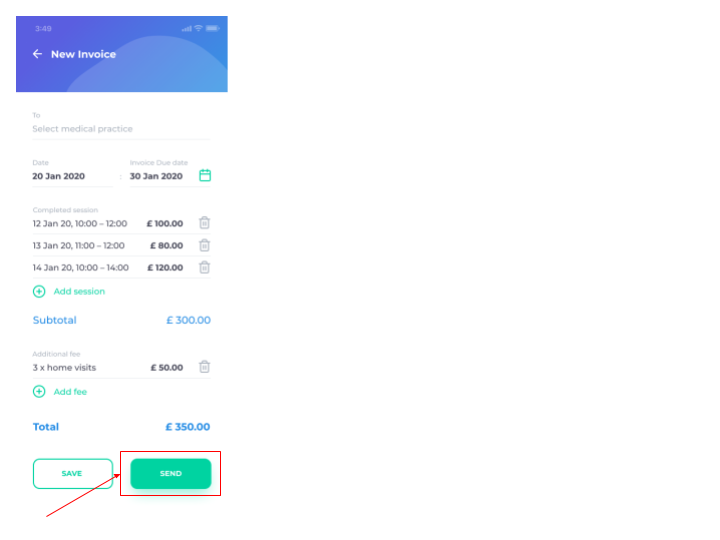
To send an invoice to a healthcare organisation, click on the invoice and then click on the ‘Send’ button.
Expenses
How do I add an expense?
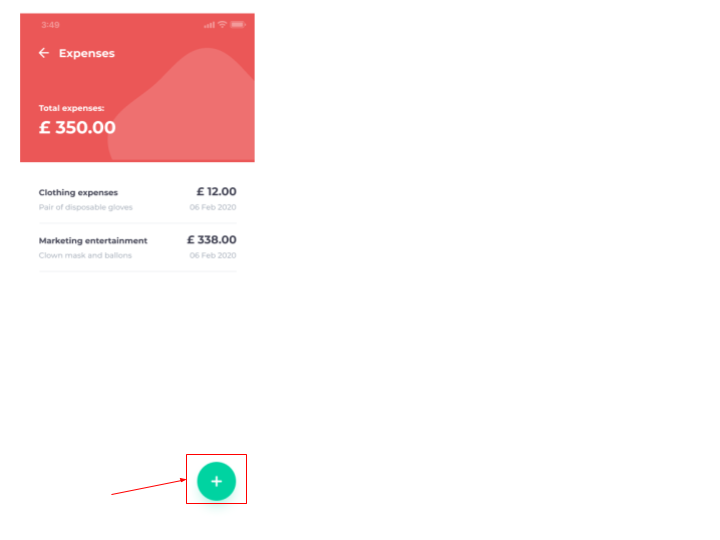
To add an expense, click on the ‘More’ item on the menu at the bottom of the screen then click on ‘Expenses’, then click on the ‘+’ button.
How do I edit an expense?
To update an expense, click on the ‘More’ item on the menu at the bottom of the screen, then click on ‘Expenses’, then the respective expense.
Financial reports
How do I access financial information?
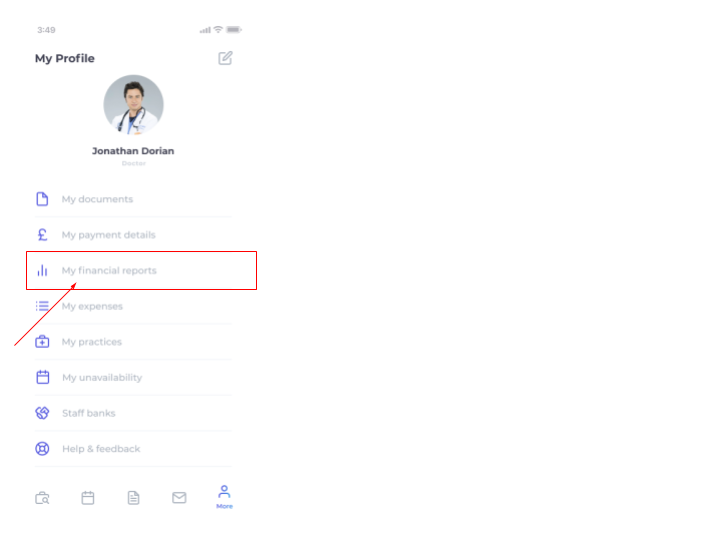
To view the financial reports / data, click on the ‘More’ item on the menu at the bottom of the screen. Then click on ‘Financial reports’.
Extracting data
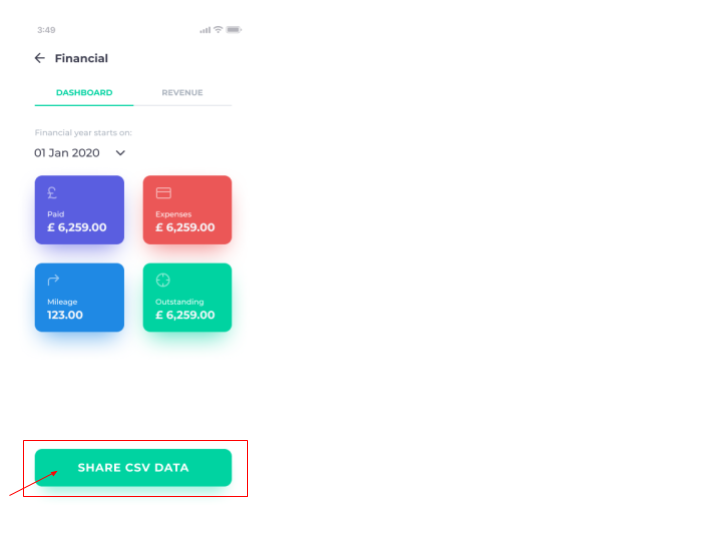
How do I extract the invoice and expense data for my accountant?
To extract financial data, click on the ‘More’ item on the menu at the bottom of the screen. Then click on ‘Financial reports’ followed by ‘Extract CSV’.
Sign Up
How do I sign-up?
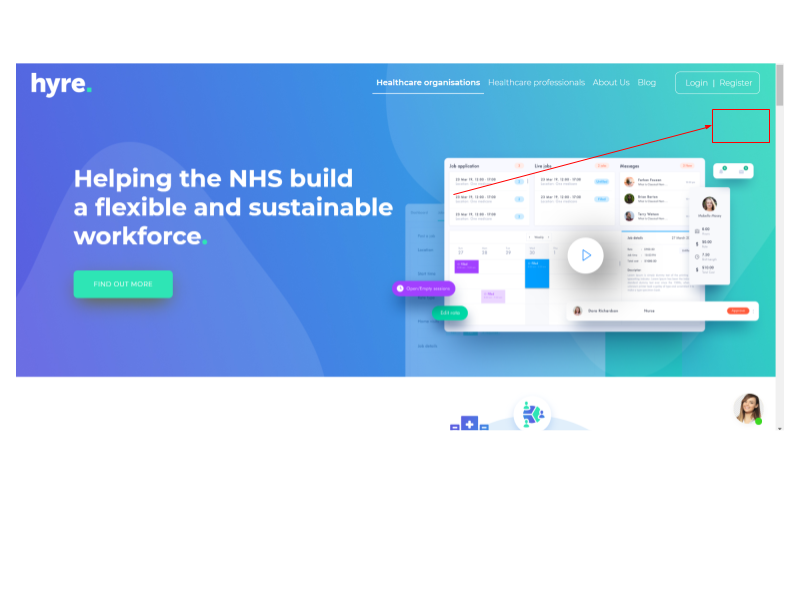
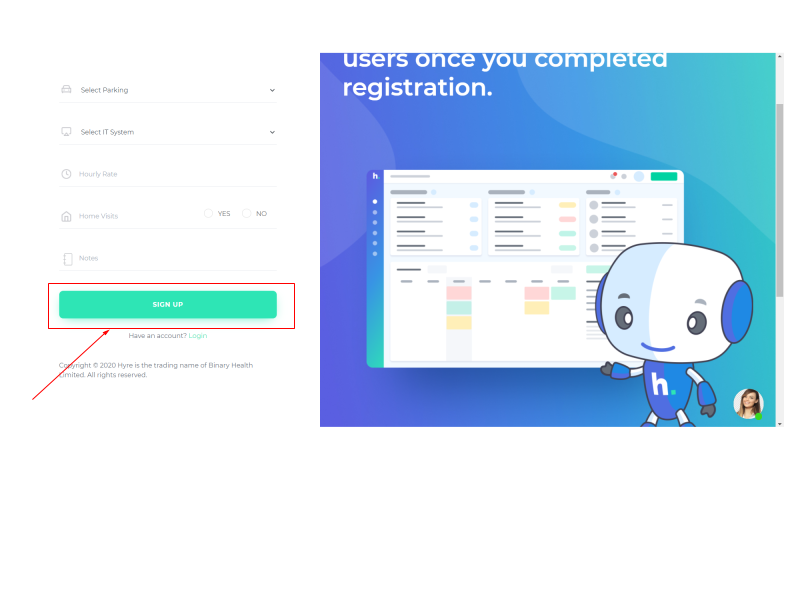
You can sign-up as a healthcare organisation by clicking on the ‘Register’ button at the top right of the screen. You then input the information relevant to your healthcare organisation and click on
How do I add multiple users to my account?
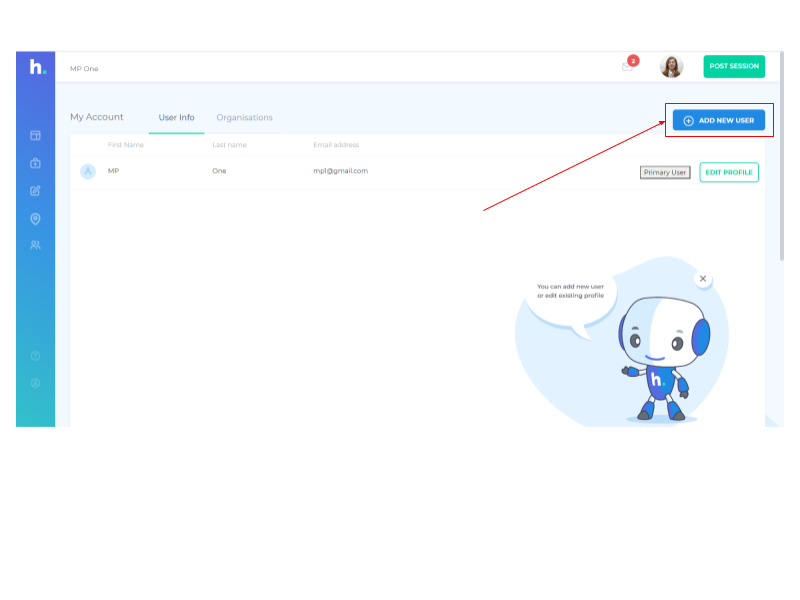
You can give access to additional users on Hyre. This gives you more flexibility, allowing you to share the workload especially when you may be off work. To add another user, click on ‘My account’ on the menu on the left side of the screen.
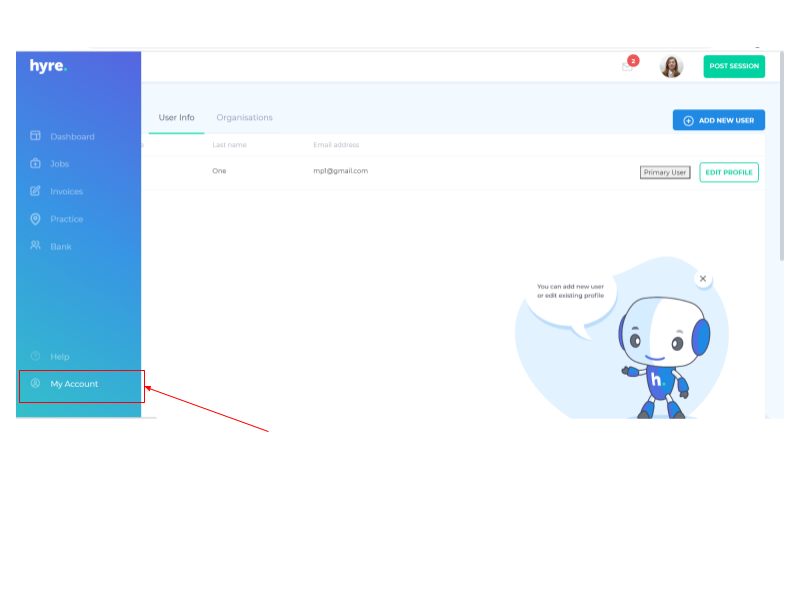
Then click on ‘Add user’ at the top right of the screen and input the user's first name, second name and email address. Then click add at the bottom of the screen. The user will then be sent an email where they can set their password and then access the system.
How do I add multiple practices to my account?
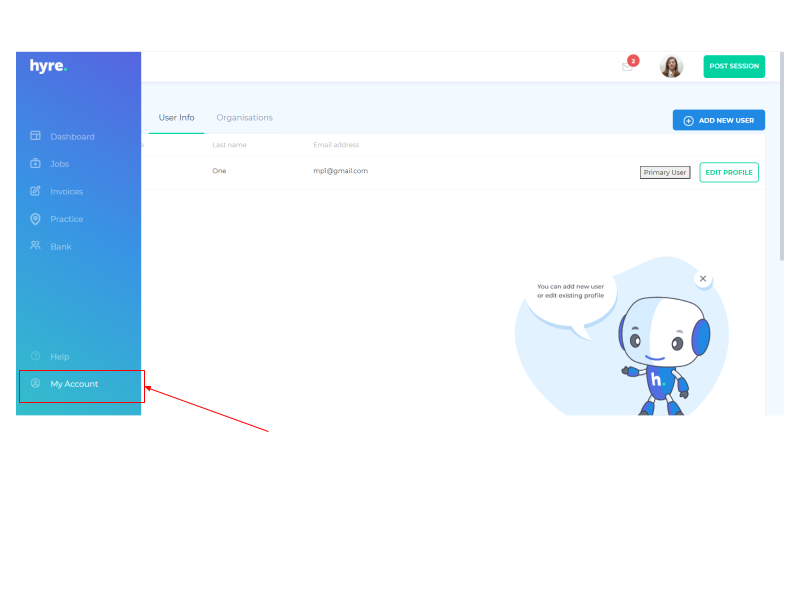
You can multiple practices or healthcare organisations to your account. This makes it easy for you to manage staff across multiple locations without needing to create separate accounts. To add another practice, click on ‘My account’ on the menu on the left side of the screen.
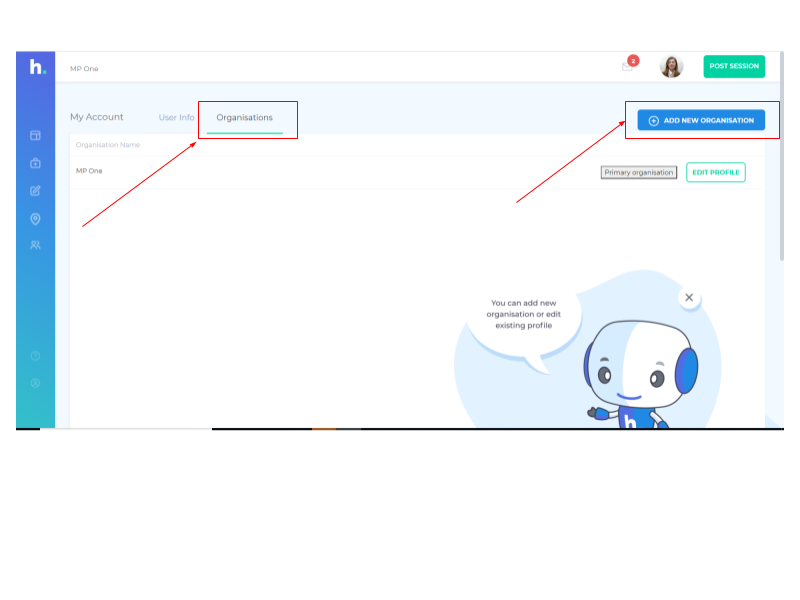
Then click on ‘Organisations and ‘Add new organisation’. Input the details of the new practice / organisation and click on ‘Add’.
Jobs
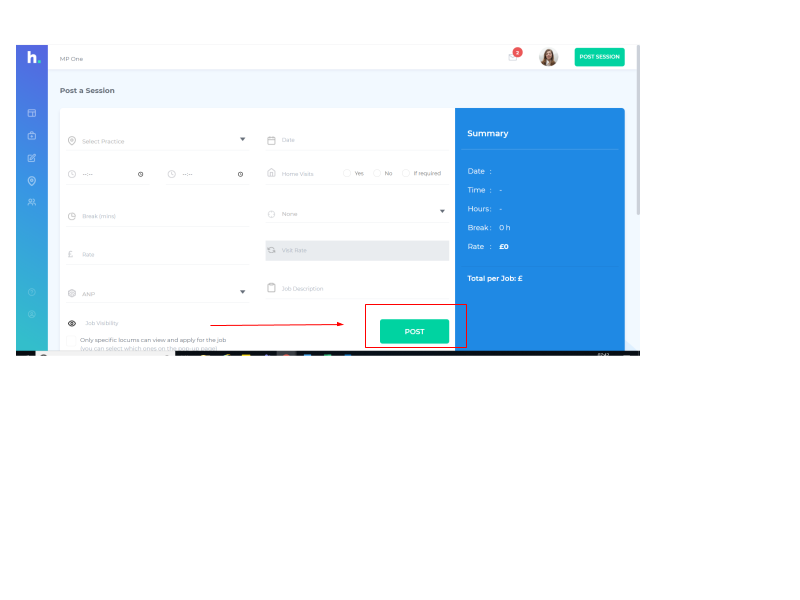
How do I post a job?
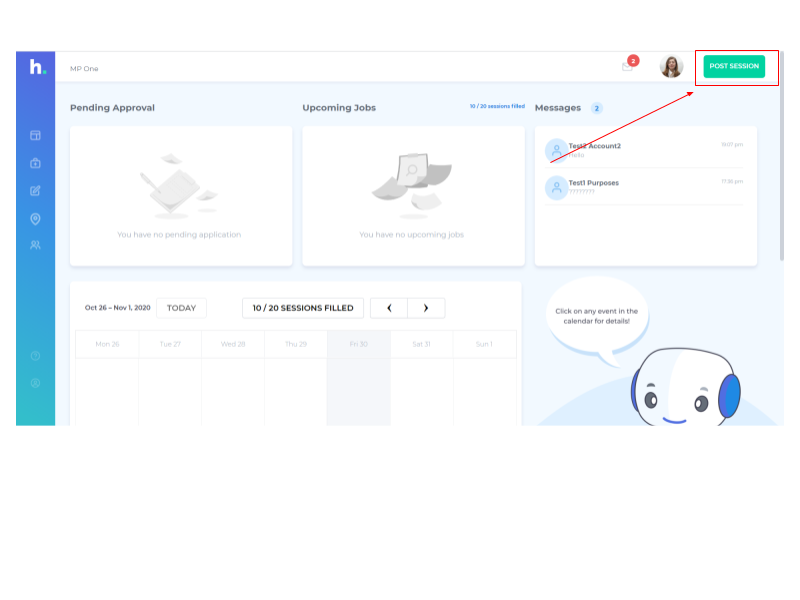
To post a job, click on the ‘Post job’ button at the top right of screen and fill in the job details and click the ‘Post’ button.
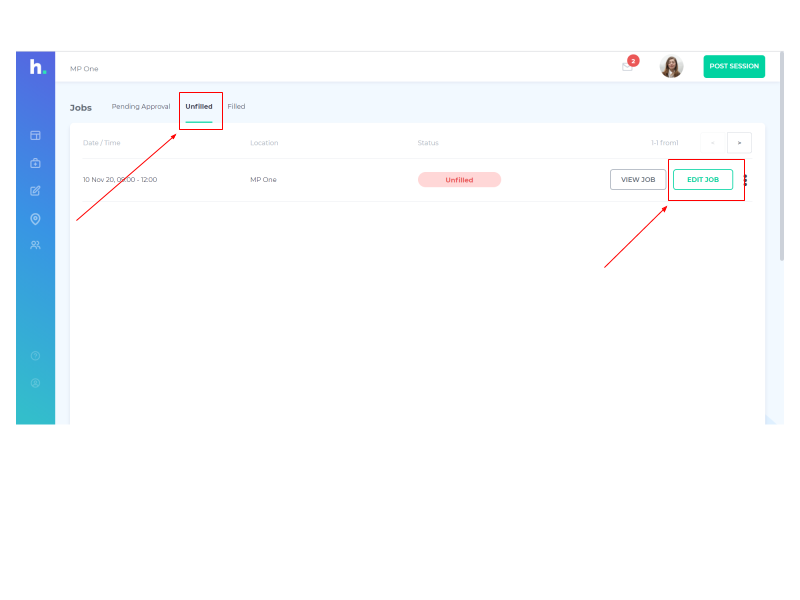
How do I edit or delete a job?
Jobs can be edited if required. To edit a job, click on the jobs menu on the left of the screen. Then select the ‘Unfilled’ tab and click the ‘Edit’ button. Make the necessary changes and click the ‘Update’ button.
How do I approve a job?
Jobs that have received applications from healthcare professionals appear on the dashboard in the ‘Pending Approval’ panel and also in the ‘Pending Approval’ tab under the ‘Jobs’ menu. Click on the job which will take you to the list of applicants. Then click the ‘Approve’ button.
Invoices
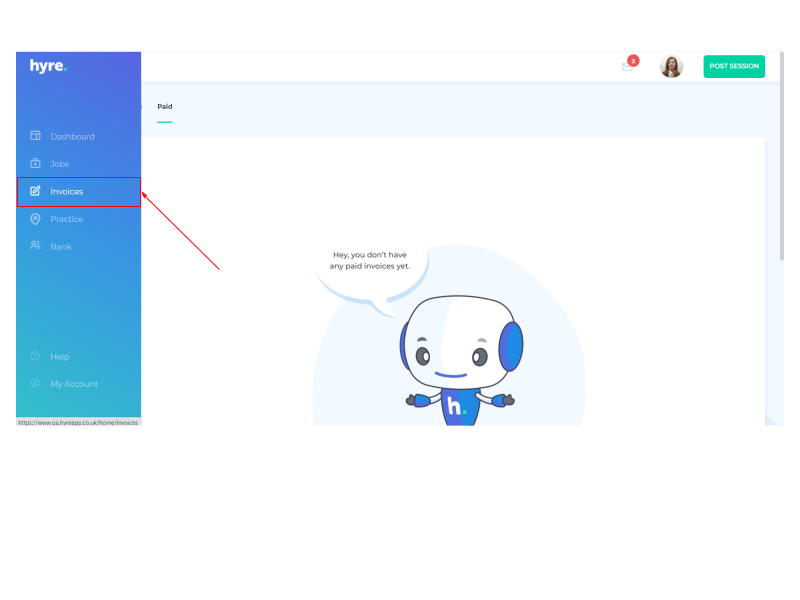
How do I view an invoice sent by a locum?
You will receive locum invoices sent via the hyre app by email. You can also view the invoice in the hyre app by clicking on the ‘Invoices’ items in the menu on the left hand side of the screen. Once paid, the invoice can be marked as paid.
Messages
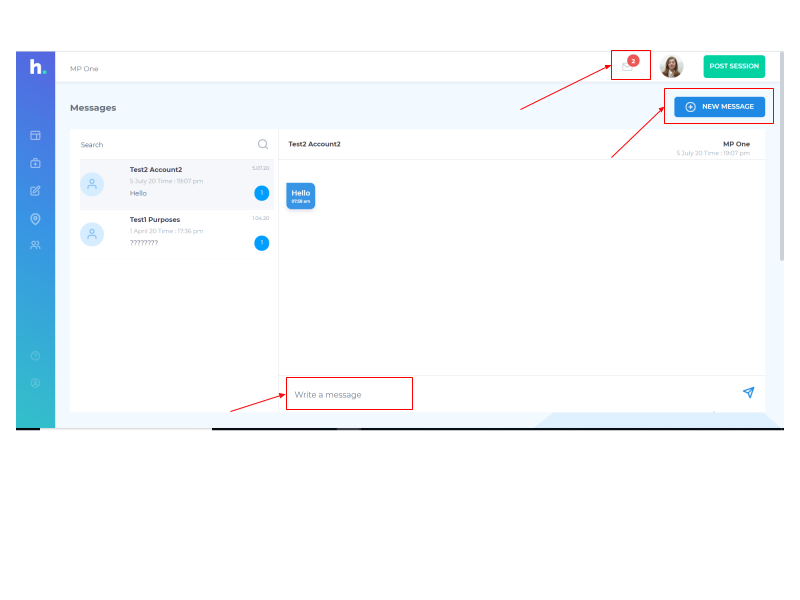
How do I view a message from a locum?
You can view messages from locums via the dashboard screen or by clicking on the message icon at the top of the screen. This will take you to your message inbox where you can read the message and if required reply.
GP Profiles
How do I view a locum profile?

